Make your sandwiches better with homemade sourdough loaves. They are soft, fluffy, and have a tight crumb. This recipe uses all-purpose flour, olive oil, honey, and a sourdough starter.
Whether you like a classic white loaf or whole wheat, this bread is great. It’s easy to make and tastes amazing. You can bake like a pro in your kitchen with a few simple steps.
Table of Contents
Key Takeaways:
- Soft, light, and fluffy sourdough sandwich bread recipe
- Versatile dough can be used for classic white or whole wheat loaves
- Requires active sourdough starter fed 12 hours before mixing
- Adjust starter ratio based on kitchen temperature and desired rise time
- Yields two loaves, with option to freeze one for later use
Understanding Sourdough Basics and Benefits
Exploring sourdough bread baking is a fascinating journey for anyone interested in artisan baking. Sourdough bread uses a fermented flour-water mix, called a sourdough starter, for its unique rise and flavor. Unlike regular bread, sourdough relies on natural yeasts and bacteria for fermentation.
What Makes Sourdough Different from Regular Bread
Sourdough and regular bread differ mainly in how they rise. Sourdough uses a sourdough starter, a mix of wild yeast and bacteria, for fermentation. This process takes 12 to 36 hours, creating a tangy flavor and chewy texture. Regular bread, on the other hand, uses commercial yeast for a faster rise.
Health Benefits of Homemade Sourdough
Homemade sourdough bread has several health benefits. The fermentation process breaks down gluten and phytic acid, making it easier to digest. It’s also packed with B vitamins and antioxidants, which support healthy aging. Plus, its slow-digesting carbs help control blood sugar levels, making it a healthier option than regular bread.
The Science Behind Fermentation
The sourdough fermentation process is a remarkable example of microbiology. The sourdough starter is a mix of wild yeasts and bacteria that leaven the dough and give it flavor. As it ferments, the bacteria create acids that add to the bread’s tanginess and shelf life. This complex process is what makes sourdough so unique and interesting.

“Sourdough bread is a true labor of love, requiring patience, skill, and a deep appreciation for the art of traditional breadmaking.”
Essential Ingredients for Sourdough Sandwich Bread
Making the perfect sourdough sandwich bread begins with the right ingredients. You’ll need a few key elements for consistent, flavorful results:
- Unbleached all-purpose flour (preferably King Arthur for its higher protein content)
- Warm water (around 80°F)
- Active sourdough starter
- Honey (or maple syrup for a vegan option)
- Light olive oil
- Kosher salt (such as Morton’s)
Getting the measurements right is key for consistent results. The olive oil helps create a crisp crust and a soft crumb. The honey adds complex, nuanced flavor to your sourdough sandwich bread creations.
| Ingredient | Amount |
|---|---|
| Unbleached all-purpose flour | 500g |
| Warm water (80°F) | 285g |
| Active sourdough starter | 70g |
| Honey | 16g |
| Olive oil | 12g |
| Kosher salt | 13g |
With these sourdough starter tips and the right sandwich bread variations, you’ll be well on your way to baking delicious, homemade sourdough sandwich loaves.

Creating and Maintaining Your Sourdough Starter
Starting a sourdough starter is key to making great homemade bread. With a few easy steps, you can have a healthy starter. It will be the base for your sourdough sandwich loaves.
Feeding Schedule for Active Starter
To keep your starter active, feed it often. Aim to feed it once or twice a day. Use a 1:1:1 ratio of starter, flour, and water. For example, add 1 cup of each to 1 cup of starter.
Stir well and let it ferment at room temperature for 8-12 hours. Then, feed it again.
Signs of a Healthy Starter
- Doubled in size within 8-12 hours after feeding
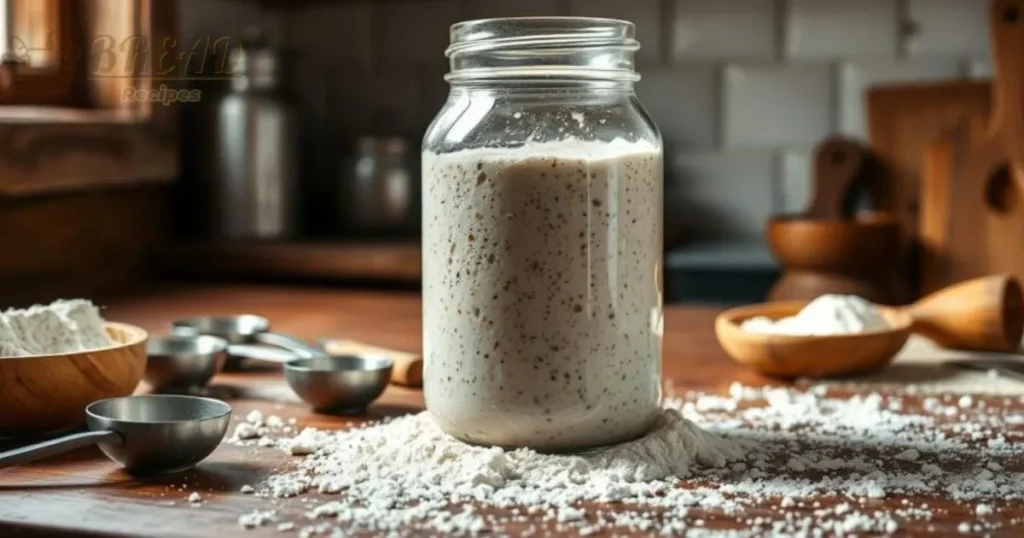
- Bubbly, expanded appearance with a pleasant, slightly tangy aroma
- Passes the “float test” by dropping a small amount of starter into water and observing if it floats
Troubleshooting Common Starter Issues
If your starter isn’t right, here are some tips:
- Lack of Rise: Increase the feeding ratio or try a different flour type.
- Mold Growth: Discard the moldy part, clean the container, and start again with fresh flour and water.
- Off Smells: Adjust the feeding schedule or use filtered water instead of tap water.
By following these sourdough starter tips, you’ll have a healthy starter. It will help you make delicious sourdough bread troubleshooting.
Required Tools and Equipment
Making the perfect sourdough sandwich bread needs more than just good ingredients. You’ll need the right tools and equipment for a successful bake. From special pans to precise measuring tools, the right gear helps get the perfect texture and rise for your homemade sourdough bread.
You’ll first need a high-quality 9×4″ loaf pan with ridged sides and sharp corners. This design helps make the classic square shape of a sandwich loaf. Also, a Danish dough whisk is key for mixing the sourdough dough. It ensures all ingredients are well mixed.
A metal bench scraper is crucial for handling and shaping the dough. It helps keep the dough’s structure and consistency just right. For precise measurements, a kitchen scale is essential. Accurate ingredient ratios are vital for perfect artisan bread recipes.
It’s also important to keep an eye on the water and dough temperature. A reliable thermometer is a must-have for this. Lastly, covering the dough during proofing is key. A simple shower cap or piece of plastic wrap works well for this.
With these essential tools, you’ll be well on your way to mastering sourdough bread baking. You’ll be making delicious sandwich loaves in your own kitchen.
| Tool | Purpose |
|---|---|
| 9×4″ Loaf Pan | Achieve the classic sandwich loaf shape |
| Danish Dough Whisk | Efficiently mix and incorporate ingredients |
| Metal Bench Scraper | Handle and shape the dough with precision |
| Kitchen Scale | Ensure accurate ingredient measurements |
| Thermometer | Monitor water and dough temperature |
| Shower Cap or Plastic Wrap | Cover the dough during proofing |
Step-by-Step Sourdough Sandwich Bread Recipes
Making sourdough sandwich bread at home is a fun and tasty journey. We’ll look at three recipes: a classic white loaf, a whole wheat version, and a honey and olive oil mix.
Classic White Sandwich Loaf
This recipe is the base for perfect sourdough sandwich bread. Start by mixing your sourdough starter with warm water, olive oil, and honey. Then, add bread flour and salt, kneading until it’s smooth.
Do stretch and fold techniques a few times. Let the dough ferment for 8-12 hours. Shape it into a loaf and let it proof overnight. Bake at 375°F for 35-45 minutes.
Whole Wheat Variation
Try a heartier version by using 30-50% whole wheat flour. This adds a nutty flavor that goes well with sourdough. You might need to adjust the water to get the right texture.
Honey and Olive Oil Version
Make your bread even richer by adding more honey and olive oil. This will give it a soft crumb and a hint of sweetness. It’s perfect for your favorite fillings.
Choose any recipe and enjoy the process of sourdough baking. With practice, you’ll make bread that’s as good as from a bakery.
Mastering the Stretch and Fold Technique
The stretch and fold technique is key to making perfect sourdough bread baking. It’s a gentler way to build the dough’s strength compared to kneading. This method helps create a dough that’s both strong and soft.
To get good at the stretch and fold, do 4 sets, with breaks of 20-30 minutes in between. Here’s how to do it:
- Lift a corner of the dough and stretch it out without tearing it.
- Fold the dough over the middle.
- Turn the bowl and stretch and fold the other sides.
- Let the dough rest for 20-30 minutes before doing it again.
This technique makes your artisan bread recipes smooth and elastic. It’s gentle, so it keeps the dough’s air pockets intact. This results in a bread that’s light and airy.
| Technique | Benefits |
|---|---|
| Stretch and Fold | – Develops gluten structure without over-kneading – Preserves delicate air pockets – Creates a soft, elastic dough |
Learning the stretch and fold method lets you bake sourdough bread that’s always a hit. It ensures your bread has a great texture and crumb.
Proper Fermentation and Proofing Guidelines
To make the perfect sourdough sandwich bread, you need to control fermentation and proofing well. These steps are key to the bread’s texture and taste. Getting them right can make a big difference in your homemade loaf.
Bulk Fermentation Tips
Start by letting the dough rise for 4-5 hours at room temperature. Or, for less work, let it rise overnight in the fridge. This longer time lets the sourdough starter’s yeasts and bacteria work. They create deep flavors and a soft, chewy crumb.
Final Proofing Indicators
After the first rise, shape and proof the loaf in a bread pan. This step takes 2-3 hours, during which the dough should double. To see if it’s ready, do the “poke test” – press your finger gently into the dough. If it springs back slowly, it’s proofed enough.
Temperature and Timing Considerations
The time for fermentation and proofing changes with your kitchen’s temperature. Warmer temperatures, like 80°F (26°C), speed up the process. Cooler temperatures, 74-76°F (23-24°C), slow it down. In a fridge at 39°F (4°C), it proofs for 10-16 hours overnight.
Watch your dough closely and adjust the time as needed. Use visual cues and the “poke test” to guide you. By following these guidelines, you’ll bake perfect sourdough sandwich loaves every time.
Baking Tips for Perfect Sandwich Loaves
To make perfect sourdough sandwich bread, pay close attention to the baking steps. First, heat your oven to 375°F. To get a crisp crust, spray the loaf with water and add ice cubes in the oven just before baking.
Bake the bread for 35-45 minutes until it’s golden brown. For a softer crust, brush it with melted butter right after baking. Let the bread cool completely before slicing. For thinner slices, wait until the next day to cut it.
| Ingredient | Quantity |
|---|---|
| Active Sourdough Starter | 150g out of 500g of all-purpose flour |
| Feeding Schedule for Starter | 8 AM |
| Starter Doubling/Tripling Time | 4-12 hours |
| Hands-on Time for Bread | Approximately 30 minutes |
| Baking Temperature | 380°F for 35 minutes |
| Cooling Time Before Slicing | 10 minutes |
| Storage for Longer Shelf Life | Slice the loaf and store in an airtight container on the counter for up to 48 hours, then freeze the remaining bread in a ziplock bag |
| Defrosting Frozen Bread | Place the slices in an airtight container on the counter overnight or microwave for 30 seconds or toast |
By following these tips, you can make perfect sourdough sandwich bread recipes every time. Enjoy your homemade crusty sourdough boules for delicious sandwiches, toast, or just on their own.
Storage and Preservation Methods
Keeping your homemade sourdough loaves fresh is key to enjoying them fully. Store your sourdough bread baking creations in an airtight container or bag at room temperature for up to 3 days. For longer storage, slice and freeze your homemade sourdough loaves for up to 2 months. Frozen slices can be reheated in a toaster, giving you that fresh-baked taste.
Don’t store your sourdough bread in the fridge. It can make the bread stale faster. Use a paper bag or bread box to keep the crust crunchy. Sourdough’s special fermentation process, thanks to lactic acid bacteria, makes it last longer than regular bread. This means you can enjoy it for days without preservatives.
By using these easy storage tips, you can enjoy your homemade sourdough for days or even weeks. You’ll love the flavors and textures that make sourdough so special.
FAQ
What makes sourdough bread different from regular bread?
Sourdough bread uses natural yeast for leavening. This gives it a tangy flavor and a longer fermentation process. It’s different from regular bread in these ways.
What are the potential health benefits of homemade sourdough bread?
Homemade sourdough has health benefits. It’s made with minimal, high-quality ingredients. The fermentation process breaks down gluten and phytic acid, making it easier to digest.
What are the key ingredients for making a soft sourdough sandwich bread?
Key ingredients include unbleached all-purpose flour and warm water. You also need an active sourdough starter, honey or maple syrup, light olive oil, and kosher salt.
How do I create and maintain a healthy sourdough starter?
Create a starter in 7 days with flour and water. Feed it regularly to keep it active. Look for bubbles and a tangy smell for a healthy starter.
Adjust feeding ratios and temperature to fix issues like lack of rise or mold.
What essential tools do I need for baking sourdough sandwich bread?
You need a 9×4″ loaf pan and a Danish dough whisk. A metal bench scraper, kitchen scale, thermometer, and covering materials are also essential.
How do I perform the stretch and fold technique for developing gluten structure?
The stretch and fold technique replaces kneading. Do 4 sets, spaced 20-30 minutes apart. Lift and stretch a corner, then fold it over the center.
Rotate the bowl and repeat for all sides. This makes the dough smooth and elastic.
How do I properly ferment and proof the sourdough sandwich dough?
Let the dough rise 4-5 hours at room temperature or overnight in the fridge. Shape it and let it rise in the loaf pan until doubled, about 2-3 hours.
Use the poke test to check proofing. Adjust times based on kitchen temperature.
How do I bake the perfect sourdough sandwich loaf?
Preheat the oven to 375°F. Create steam by spraying water and placing ice cubes in the oven. Bake for 35-45 minutes until golden brown.
For a softer crust, brush with butter while still hot. Cool completely before slicing for the best texture.
How do I store and preserve my homemade sourdough sandwich bread?
Store the bread at room temperature in an airtight container or bag for up to 3 days. Slice and freeze for up to 2 months for longer storage.
Avoid the fridge to prevent staling. Store crusty bread in a paper bag or bread box to keep the crust fresh.

