Easy Sourdough Bread Recipe Without Starter: No Hassle, Delicious!
Ever dreamed of sourdough bread’s rich taste and soft texture? But thought it took too long? Don’t worry, I’ve got a quick fix for you. You can enjoy homemade sourdough in just a few hours.
I love baking bread from scratch, but sourdough can seem scary. That’s why I’m sharing a new recipe. It captures sourdough’s best without needing a starter.
Table of Contents
Key Takeaways
- Achieve sourdough-style bread without a traditional starter
- Enjoy a crispy, crackly crust and soft, airy crumb in just 3 hours
- Leverage high hydration dough and cold fermentation for robust flavor
- Perfect for beginners or those seeking a simplified sourdough approach
- Savor the lower bandwidth of sourdough taste without the hassle
Understanding Quick Sourdough Bread: A Time-Saving Alternative
Traditional sourdough bread is a labor of love, but it takes a lot of time and patience. Luckily, there’s a quicker way to make a delicious sourdough-style loaf. This easy recipe skips the starter and makes the process simpler. You can enjoy the taste of sourdough in much less time.
Why Traditional Sourdough Takes So Long
The long fermentation time is key for classic sourdough bread. It lets the natural yeast and bacteria develop complex flavors. But, this means the process can take 24 hours or more, from mixing to baking.
Benefits of Quick Method
- Reduced preparation time: This fast sourdough bread recipe can be ready in as little as 3 hours, making it a great option for busy bakers.
- Simplified process: By using commercial yeast instead of a starter, the recipe eliminates the need to maintain a living culture and plan your baking schedule around its feeding cycle.
- Consistent results: The quick method produces a reliable loaf with a sourdough-like taste and texture, without the unpredictability that can come with natural fermentation.
What Makes This Recipe Special
The secret to this simple sourdough bread recipe is its high hydration dough and long cold fermentation. These factors give the bread a chewy crumb and crisp crust. You get sourdough-like qualities without the long hours of traditional methods.
“Baking sourdough at home can be more cost-effective than buying artisanal loaves from the store, especially when considering the price of high-quality ingredients.”

Essential Ingredients for Your No-Starter Bread
Making a tasty no-starter sourdough bread is easier than you think. The secret is in picking the right ingredients for the perfect texture and taste. Let’s explore the key elements that make this recipe a hit.
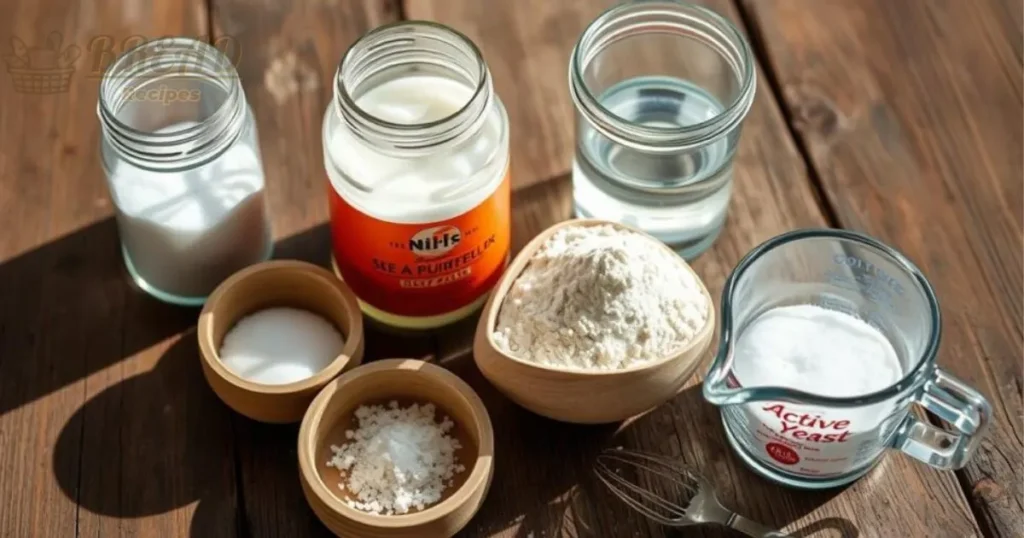
The core ingredients for this no-starter sourdough bread are:
- All-purpose flour (390g or 3 cups, loosely packed) – This flour, with a protein content around 10-10.4%, provides the structure and crumb you desire.
- Water (312ml or 1 1/4 cup + 1 tbsp) – The right amount of hydration is crucial for achieving the desired consistency.
- Salt (6g or 1 teaspoon) – A simple seasoning that enhances the overall flavor.
- Instant yeast (1.5g or 1/2 teaspoon) – This fast-acting yeast eliminates the need for a lengthy starter process.
Some recipes may also use self-rising flour or kefir as alternatives. Adding Greek yogurt can give the bread a nice tanginess.
“The use of commercial yeast in the no-starter sourdough bread recipe results in a neater distribution of air pockets and smaller air bubbles compared to traditional sourdough bread.”
By focusing on these essential ingredients and understanding their roles, you can unlock the secrets to crafting a delectable no-starter sourdough bread right in your own kitchen.

Required Equipment and Tools
Baking sourdough bread at home is easy. You don’t need a lot of special tools. But, a few key items will make your baking better and more fun.
Dutch Oven Specifications
The Dutch oven is the most important tool. It’s essential for baking a perfect sourdough loaf. Choose one that’s at least 4.3 quarts to give your dough room to grow.
The Dutch oven’s heavy cast-iron and tight lid are perfect. They help create the sourdough’s crust and crumb.
Additional Baking Tools
- Large mixing bowl: You’ll need a big bowl to mix and knead your dough.
- Wooden spoon or spatula: These tools help mix the ingredients into a single dough.
- Bench scraper: A bench scraper makes it easy to handle and shape the dough.
- Parchment paper: Use parchment paper in your Dutch oven to prevent sticking and make it easy to remove the bread.
- Oven thermometer: An oven thermometer ensures your oven is at the right temperature for baking sourdough bread.
Optional Equipment
Some tools are nice to have but not necessary:
- Banneton (proofing basket): This basket helps keep the dough’s shape during the second rise.
- Bread lame or sharp knife: Use a lame or sharp knife to score the dough’s top before baking. This creates the artisanal look.
With these tools, you’re ready to bake sourdough bread like a pro. Remember, good equipment is key for sourdough bread baking.
The Science Behind Sourdough Bread Recipe Without Starter
Making sourdough bread without a starter might seem odd. Yet, the science behind this quick method is fascinating. It uses high water content and cold fermentation to get the same taste and texture as traditional sourdough. This is done without needing a special starter culture.
Commercial yeast is the main leavening agent here. It’s not the same as the slow, wild yeast in traditional sourdough. But, it still gives bread that tastes and feels similar. The cold fermentation helps the dough develop gluten and complex flavors, just like long sourdough rising.
Sourdough recipes usually have 65% to 75% hydration. This is key for the right texture and rise. The no-starter method also uses 65% to 75% hydration. This makes the dough soft and well-developed.
| Ingredient | Typical Range |
|---|---|
| Hydration | 65% to 75% |
| Baker’s Percentage | 65% to 75% |
This quick method might not be exactly like traditional sourdough. But, it’s a great option for home bakers. It shows how changing the fermentation process can get close results. And it does this without needing a special starter culture.
Step-by-Step Mixing and Dough Preparation
Making sourdough bread without a starter is a fun baking adventure. It’s all about the right mixing and dough prep. Let’s explore how to make your no-starter sourdough bread perfect every time.
Creating the Perfect Dough Consistency
Begin by mixing dry ingredients. Use sourdough bread mixing techniques with organic bread flour and fine artisan sea salt. Mix them gently until they’re well combined. Then, add room temperature water and knead the dough by hand or with a stand mixer.
Knead until the dough is sticky and wet. Make sure there’s no dry flour left.
Temperature and Timing Considerations
The water temperature is key for dough preparation for no-starter bread. Aim for water between 65°F to 75°F (18°C to 24°C). This helps the dough rise well.
After mixing, cover the bowl. Let the dough rise at room temperature for about 2 hours. It should look relaxed and slightly bigger.
Visual Cues for Perfect Hydration
- The dough should be sticky and wet, with no dry flour.
- When gently poked, it should slowly spring back, showing it’s well-hydrated.
- Look for small air bubbles on the surface, which means fermentation is happening.
By using these sourdough bread mixing techniques and dough preparation for no-starter bread tips, you’re on your way to a great rise. You’ll get a delicious, artisanal crumb.
“The key to perfect sourdough bread without a starter lies in mastering the dough preparation process. With the right techniques, you can create a beautifully structured, flavorful loaf in just a few hours.”
First Rise and Dough Development
After mixing the ingredients and shaping the dough, it’s time for the first rise. This step is key for building the dough’s gluten and deepening its flavor.
Let the dough rise at room temperature for about 2 hours. The natural yeasts and bacteria will break down sugars, creating carbon dioxide. This makes the dough expand and become airier. After 2 hours, gently deflate the dough and smooth it out to even out the gases.
The dough should now be softer and easier to work with. The first rise is a critical step in making sourdough bread. It prepares the dough for shaping and baking.
Next, move the dough to the fridge for cold fermentation. This can last from 6 hours to 4 days, with 18 hours to 3 days being best for flavor. The fridge slows down fermentation, letting flavors mature and gluten strengthen.
The timing of the first rise and cold fermentation can change based on several factors. Room temperature, starter strength, and personal taste all play a role. Watch the dough and adjust times to get the best texture and taste.
Shaping Techniques for Artisanal Results
Learning to shape sourdough bread is key to making loaves like a pro at home. After the dough ferments in the fridge, it’s time to pre-shape it. This step helps the dough develop its structure and surface tension.
Gently folding the dough onto itself builds strength and shape. This is before the final shaping.
Basic Boule Formation
To make a classic boule, start by flattening the dough into a circle. Fold it in half, then in half again, making a tight ball. Hold the dough with your hands and rotate it on a clean surface.
This creates surface tension and a smooth, tight exterior.
Creating Surface Tension
Keeping the right surface tension is crucial for artisan sourdough bread. Don’t overhandle the dough, as it can lose air bubbles. Use a bench scraper or your hands to stretch and fold the dough gently.
This creates a tight, smooth outer layer.
Common Shaping Mistakes
- Overhandling the dough, leading to deflation
- Inadequate surface tension, resulting in a flat, dense loaf
- Skipping the pre-shaping step, which compromises the final shape
Mastering these shaping techniques will help you bake sourdough bread that looks and tastes amazing. Keep practicing, and your homemade loaves will soon be as good as those from your favorite bakery.
Second Rise and Proofing Methods
After shaping your sourdough bread, it’s time for the second rise. This step is key for the bread’s texture and taste. The proofing time can change based on several factors, aiming for the right balance.
Put the dough in a proofing basket or bowl with parchment paper. This keeps the loaf’s shape as it grows. Let it proof in the fridge for 35 to 40 minutes. It’s ready when it springs back slowly with a finger poke.
Watch the proofing closely to avoid overproofing. This can cause the bread to collapse. Recipes might suggest a longer room temperature proof, so check your recipe’s instructions.
The second rise is about controlled fermentation. Yeast and bacteria make the dough expand, giving it the sourdough bread proofing look. The fridge slows this down, allowing for a controlled second rise techniques.
| Proofing Temperature | Proofing Time |
|---|---|
| 80°F (26°C) | 1 to 2 hours |
| 74 to 76°F (23-24°C) | 2 to 4 hours |
| 46°F (8°C) | 6 to 8 hours |
| 39°F (4°C) | 10 to 16 hours |
The proofing time can change with your dough’s ingredients and temperature. Keep an eye on your bread and trust your senses. With practice, you’ll master the sourdough bread proofing and second rise techniques for a tasty homemade loaf.
Baking Temperature and Timing Guidelines
To get the perfect sourdough bread, pay close attention to temperature and timing. Preheat your Dutch oven to 450°F (232°C). This is crucial for the right baking environment. Once your dough is ready, put it in the preheated Dutch oven and bake covered for 30 minutes.
Dutch Oven Temperature Control
Some recipes start with a higher temperature, 480°F (250°C), for the first 25 minutes. Then, they lower the heat to 425°F (220°C) for the next 20-25 minutes with the lid off. This method helps get a golden-brown crust and ensures the inside is fully cooked.
Steam Creation Methods
Creating steam in the Dutch oven is key for a perfect sourdough crust. The Dutch oven’s closed space naturally makes steam, which is vital for crust development. Baking usually takes about 45-50 minutes, allowing the bread to reach its best.
By controlling temperature and using steam, you can bring out the full flavor and texture of your sourdough bread. With a bit of practice, you’ll make loaves as good as those from a bakery in your own kitchen.
Achieving the Perfect Crust and Crumb
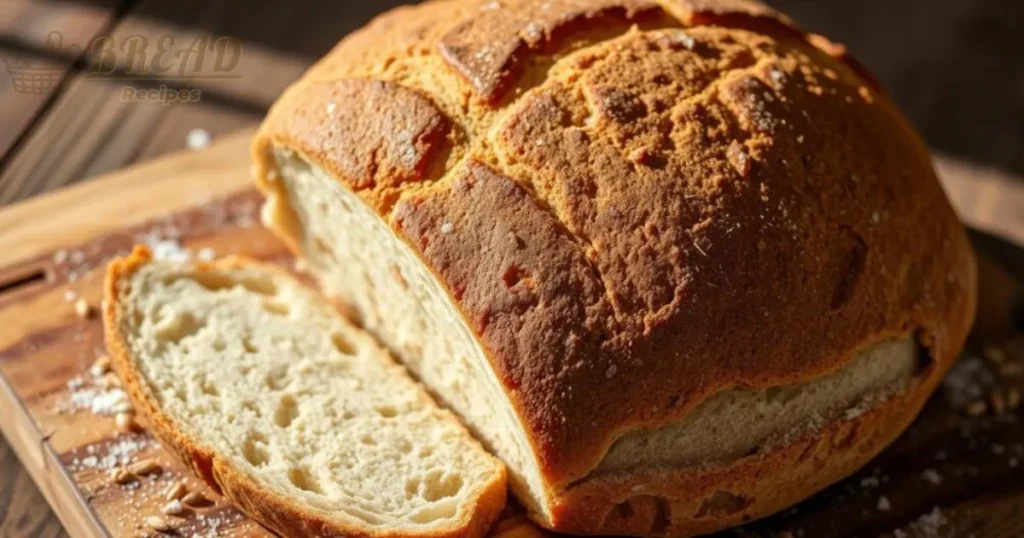
Baking the perfect sourdough bread is all about finding the right balance. The crust gets crispy and caramelized from baking in a hot Dutch oven. The soft, airy crumb comes from how you handle the dough while shaping.
The secret to a great sourdough crust is high heat and steam. Preheat your Dutch oven to 450°F (225°C). This heat quickly sets the dough and makes it golden brown. The steam helps the dough expand freely during baking.
After removing the lid, bake at 400°F (200°C) for a bit longer. This makes the crust even crunchier. The sourdough bread crust should crackle when you slice it, with a sweet caramel flavor.
To get the perfect bread crumb, handle the dough gently. Overworking can ruin the air pockets that make the bread soft. Shape the dough into a smooth, tight boule to keep these air pockets.
“The secret to a beautiful sourdough bread lies in the balance between a crisp, caramelized crust and a soft, tender crumb. It’s a delicate dance of heat, steam, and gentle handling.”
Mastering high-heat baking, steam management, and gentle dough handling will get you the perfect sourdough. You’ll have a loaf with a crunchy sourdough bread crust and a soft, flavorful perfect bread crumb. Your friends and family will love it.
Storage and Serving Suggestions
After baking, let your homemade sourdough bread cool for about 1.5 hours before slicing. This step is key for the right texture. Enjoy it fresh, or store it in a paper bag at room temperature for 2-3 days.
For longer storage, slice the bread and freeze it. When you’re ready, thaw and enjoy it as is or lightly toast it.
This vegan sourdough bread is great with many things. Eat it as is, or use it for sandwiches. It’s also perfect for bruschetta or with hearty soups. Its complex flavor and soft crumb make it versatile for any meal.
Proper storage and serving keep your sourdough bread fresh and delicious. Follow these tips to enjoy your homemade bread and impress everyone with your baking skills.
FAQ
What is the difference between this quick sourdough bread recipe and traditional sourdough?
This recipe doesn’t need a sourdough starter. It uses commercial yeast instead. It also uses high hydration dough and long cold fermentation. This makes it taste and feel like traditional sourdough.
How long does the dough fermentation take in this recipe?
The dough ferments twice. First, it rises for 2 hours at room temperature. Then, it chills for 18 hours to 3 days in the fridge. This long cold time is crucial for the sourdough flavor and texture.
What are the essential ingredients needed for this no-starter sourdough bread?
You’ll need all-purpose flour, water, salt, and instant yeast. Some recipes might add self-rising flour or Greek yogurt for extra tanginess.
What equipment is required for baking this sourdough bread?
You’ll need a Dutch oven (at least 4.3 quarts), a big mixing bowl, a spoon or spatula, a bench scraper, and parchment paper. An oven thermometer is also good for accurate temperatures.
How do I achieve the perfect crust and crumb for this sourdough bread?
High initial baking temperature and steam from the Dutch oven create a crispy crust. Don’t overwork the dough when shaping. This keeps the crumb soft and airy.
How should I store and serve this no-starter sourdough bread?
Cool the bread completely before slicing. This is key for the right texture. Store it at room temperature in a paper bag for 2-3 days. For longer storage, freeze the slices. Enjoy it fresh, lightly toasted, or as a sandwich base.

