
Ever wondered why your homemade bread doesn’t taste like the ones from bakeries? The secret is in mastering key bread baking techniques. These techniques turn simple ingredients into amazing bread.
Getting the right measurements is key to making great homemade bread. Professional bakers know that being precise is what makes bread good. It’s not just about following a recipe. It’s about understanding the science behind each ingredient.
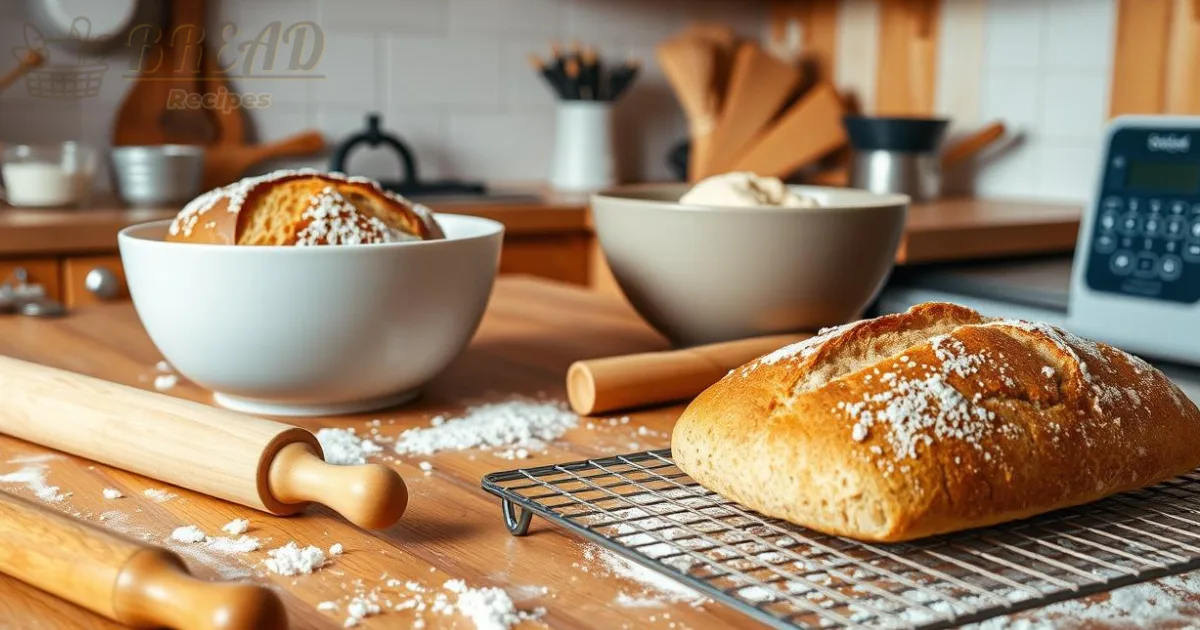
To make perfect bread, start by learning the basics. This includes picking the right ingredients and measuring them accurately. These tips will improve your baking skills. Soon, you’ll be making delicious loaves that are as good as those from bakeries.
Table of Contents
Homemade Bread Tips for Perfect Results
Key Takeaways
- Precision is crucial in bread baking measurement
- Understanding ingredient interactions matters
- Temperature and fermentation are critical factors
- Practice and patience lead to better results
- Quality tools can significantly improve bread quality
- Each ingredient plays a specific role in bread development
- Consistency is key to successful bread making
Understanding the Basics of Bread Making
Making delicious artisan bread starts with knowing the basics. It’s a mix of science and art. It turns simple ingredients into amazing, fragrant loaves.

The Role of Ingredients in Bread
Bread making has five main ingredients:
- Flour: The base of any bread
- Water: Hydrates and activates the ingredients
- Salt: Adds flavor and controls yeast
- Yeast: Gives rise and texture
- Optional flavorings
Common Types of Bread Flour
Knowing about bread flour types is key for good baking. Each type changes your bread’s texture and look.
| Flour Type | Protein Content | Best Used For |
|---|---|---|
| All-Purpose Flour | 10-12% | Basic breads, pastries |
| Bread Flour | 12-14% | Artisan bread recipes, high-rise loaves |
| Whole Wheat Flour | 13-14% | Hearty, nutritious breads |
Understanding Yeast and Its Importance
Yeast is the magic that makes dough light and airy. There are different types:
- Fresh Yeast: Used by pros, very perishable
- Active Dried Yeast: Needs warm water to activate
- Instant Yeast: Quick and easy to use
“Bread is the king of the table and all else is merely an accompaniment.” – Louis Bromfield
By learning about bread flour and yeast, you’ll make amazing homemade bread.
Essential Tools for Successful Baking
Making delicious homemade bread needs more than just good ingredients. The right tools can make a big difference. Quality equipment helps you get consistent, tasty results every time.

Must-Have Baking Equipment for Home Bakers
Some tools are key for making great homemade bread. Here’s a list of must-haves:
- Digital kitchen scale
- Digital instant-read thermometer
- Large mixing bowl
- Dough scraper
- Proofing baskets
Choosing the Right Mixing Bowls
Choosing the right mixing bowls is important. A big bowl helps mix without spills. Stainless steel or ceramic bowls are best for bread.
Using a Kitchen Scale for Accuracy
Professional bakers say to measure by weight, not volume. A digital scale gives precise measurements, which is key for bread.
“Precision is the key to perfect bread. Measure by weight, not volume.” – Professional Baker
Here’s how different measurement methods compare:
| Measurement Method | Accuracy Level | Recommended for Baking |
|---|---|---|
| Volume Measurement | Low | Not Recommended |
| Weight Measurement (Grams) | High | Strongly Recommended |
Good baking tools like the Oxo Stainless Steel Food Scale ($56) can really help your bread-making skills.
The Importance of Measuring Ingredients Accurately
Precision is key in bread baking. Getting measurements right can make your homemade bread amazing. Learning how to measure ingredients correctly is crucial for home bakers.
Measuring ingredients is a must for great homemade bread. Even small mistakes can change your loaf’s texture and taste.
Flour Measurement Precision
Measuring flour needs special techniques. Here are some tips for accurate flour measurement:
- Use a kitchen scale for weight measurements
- Fluff flour before measuring
- Gently spoon flour into measuring cup
- Level off with a straight edge
Liquid Measurement Techniques
Liquids need careful measuring too. Always use clear cups and check at eye level for accuracy.
| Ingredient Type | Recommended Measurement Method | Potential Variation |
|---|---|---|
| Dry Ingredients | Kitchen Scale | Up to 12% variance |
| Liquid Ingredients | Liquid Measuring Cup | Up to 5% variance |
| Sticky Ingredients | Lightly Oiled Measuring Cup | Minimal variance |
Handling Sticky Ingredients
Pro tip: For sticky ingredients like honey or molasses, use oil on your measuring tool. This helps get a precise measurement every time.
“Baking is a science, and every gram counts.” – Professional Baker’s Wisdom
Learning these measurement techniques will improve your bread baking. You’ll make delicious homemade bread that’s as good as bakery bread.
The Art of Kneading Dough
Kneading is key in bread making. It turns simple ingredients into a tasty loaf. Knowing how to knead right can make your bread light and airy, or dense and tough.
Kneading makes gluten, which is what makes bread elastic and strong. Glutenin and gliadin, two proteins, work together to achieve this.
Proper Kneading Techniques
Getting good at kneading takes practice. Here are some tips to improve your bread-making:
- Use the heel of your hand to push and fold the dough
- Rotate the dough quarter-turn after each push
- Maintain a consistent rhythm and pressure
Knowing When Dough is Ready
Knowing when to stop kneading is important. There are two ways to check:
- Windowpane Test: Stretch a small piece of dough until light passes through without tearing
- Poke Test: Press the dough – it should bounce back without sticking
Using a Stand Mixer vs. Hand Kneading
| Hand Kneading | Stand Mixer Kneading |
|---|---|
| Traditional method | Modern convenience |
| 3-10 minutes kneading time | 5-15 minutes kneading time |
| Requires physical effort | Less physical strain |
| Allows direct dough feel | Consistent mechanical action |
“Kneading is where the magic happens – it’s the moment your ingredients transform from simple components into the foundation of a perfect loaf.” – Professional Baker
Remember, practice makes perfect. Each time you knead, you get better at bread making. It helps you understand dough better.
The Rising Process Explained
Understanding how dough rises is key to making great bread. This stage turns simple ingredients into a light, airy loaf. It’s all thanks to a complex fermentation process.
Yeast is magical in bread making. It eats sugars and makes carbon dioxide. This creates bubbles that make bread rise. There are about 160 types of yeast, but bakers mostly use a few special ones.
The Science of Dough Expansion
Several things affect how dough rises:
- Temperature (ideal range: 80-85°F)
- Humidity levels
- Yeast freshness
- Ingredient quality
Creating the Ideal Proofing Environment
For your bread to turn out right, you need the perfect rising conditions. A warm, draft-free spot is best for yeast. Here are some tips for proofing dough:
- Use a dedicated bread proofer
- Create a DIY proofing box using your oven’s warm setting
- Cover dough with a damp cloth to keep it moist
| Rising Stage | Duration | Purpose |
|---|---|---|
| First Rise | 1-2 hours | Develop larger gas bubbles |
| Second Rise | 45-60 minutes | Create smaller, denser air pockets |
“Patience is the secret ingredient in bread baking” – Professional Baker’s Wisdom
Bread baking takes practice. Each rise adds to the flavor and texture. So, don’t rush it—let yeast do its thing!
Shaping Your Loaf Like a Pro
Mastering bread baking is an art that turns simple ingredients into stunning artisan bread. The shaping process is key to creating loaves with perfect structure and texture.
Professional bakers see dough shaping as more than just forming a shape. It’s about making a tight outer skin. This helps your bread rise beautifully and get an attractive crust.
Essential Shaping Techniques
- Develop a tight outer skin during shaping
- Create surface tension for better rise
- Use gentle handling to maintain dough structure
Different Loaf Forms
Each bread shape needs its own techniques:
| Loaf Type | Shaping Method | Proofing Technique |
|---|---|---|
| Boule | Rounded circular shape | Seam side up in banneton |
| Batârd | Stitching for added strength | Gentle cinching technique |
| Baguette | Elongated rolling | Proofed on couche |
Importance of Tension in Shaping
Surface tension is crucial in bread baking. A well-shaped dough has a smooth exterior that traps gases during fermentation. This leads to an attractive rise and consistent crumb.
“The magic of bread is in its transformation from a simple dough to a beautiful, risen loaf.” – Artisan Baker
When shaping, remember each fold and turn affects the bread’s look and texture. With practice and patience, you’ll master professional-level bread shaping.
Baking Your Bread to Perfection
Turning your dough into a tasty loaf needs careful attention to detail. Knowing about baking temperatures and the science of bread making is crucial. This knowledge will help you get professional-quality results every time.
Mastering the baking process is key to making great homemade bread. The right steps will give you a golden crust, perfect texture, and amazing flavor.
Setting the Right Oven Temperature
Baking temperatures are very important for bread. Each type of bread needs a specific heat to get the best results:
- Preheat your oven completely before baking
- Position the bread in the center of the oven
- Use an oven thermometer for accuracy
Creating the Perfect Crust with Steam
Steam is a secret tool in bread baking. It makes the crust crispy and golden while letting the bread rise well in the first stage.
| Baking Stage | Steam Recommendation |
|---|---|
| First 15 minutes | High moisture environment |
| Remaining baking time | Reduce moisture to set crust |
Determining When Bread is Fully Baked
To know when your bread is done, you need to check a few things:
- Internal temperature should reach 200°F for most bread types
- Tap the bottom of the loaf – it should sound hollow
- Look for an even, golden-brown crust
“The magic of bread baking lies in understanding the delicate balance of temperature, moisture, and technique.” – Professional Baker
With these techniques, you’ll make your homemade loaves go from good to amazing. Remember, practice and patience are essential to perfecting the art of bread making.
Tips for Flavor Development
To make your homemade bread truly special, think outside the box. Choose ingredients wisely and get creative. This way, you can turn simple dough into a feast for the senses.
Enhancing Bread with Herbs and Spices
Artisan bread recipes come alive with the right herbs and spices. Here are some tips to boost your bread’s flavor:
- Rosemary for a Mediterranean-inspired loaf
- Thyme to add earthy undertones
- Cracked black pepper for a spicy kick
- Dried garlic flakes for savory depth
Sweeteners that Transform Your Bread
Sweeteners do more than sweeten your bread. They also affect yeast activity and texture. Here are some tips for adding sweetness:
- Non-diastatic malt for subtle sweetness
- Pasteurized honey for natural flavor
- Maple syrup for rich caramel notes
Incorporating Nuts and Seeds
Nuts and seeds add texture and nutrition to your bread. Pro tip: Toast them lightly before adding to enhance flavors. Here are some tasty options:
- Toasted sunflower seeds
- Chopped almonds
- Pumpkin seeds
- Sesame seeds for a nutty crunch
“The secret to great bread is not just in the technique, but in the thoughtful combination of flavors.” – Artisan Baker
Try these flavor development techniques to make unique artisan bread recipes. Show off your baking skills and passion.
Troubleshooting Common Bread Problems
Baking bread can be tricky, but knowing common issues helps make perfect loaves. It’s key for home bakers to improve their bread-making skills.
Dense Bread Diagnosis
Dense bread can come from a few main reasons:
- Incorrect liquid-to-flour ratio
- Under-kneading the dough
- Using expired or inactive yeast
- Inadequate rising time
Rising Problems Solutions
Getting the dough to rise right is key for light, airy bread. Here are some important tips:
| Rising Issue | Potential Cause | Solution |
|---|---|---|
| Slow fermentation | Cold environment | Maintain temperature between 75°F and 85°F |
| No yeast activation | Incorrect water temperature | Use water between 105°F and 115°F |
| Collapsed dough | Over-proofing | Reduce proofing time to 90 minutes |
Preventing Overbaking
To avoid dry or burnt bread, follow these tips:
- Use an oven thermometer to verify accurate temperature
- Bake at recommended 375°F
- Check internal bread temperature (190°F indicates doneness)
- Use a darker loaf pan for even heat distribution
“Bread making is an art that improves with practice and patience.” – Artisan Baker
Remember, bread troubleshooting is about understanding your ingredients and techniques. Each loaf teaches you something new about baking!
Storing Bread for Freshness
Proper storage is key for keeping homemade bread fresh. Your freshly baked bread needs careful handling to keep its texture and taste. The type of bread and its fat content affect how long it stays fresh.
Storing bread at room temperature is best for most types. Keep it between 60°F and 80°F. Avoid the fridge, as it makes bread stale faster. A bread box can hold 2-3 whole loaves, keeping them dry and steady.
Sourdough breads last longer, often up to a week or more, thanks to their special bacteria.
Freezing is great for long-term storage. Wrap your bread in wax or parchment paper, then in an airtight container. Frozen bread stays good for up to 3 months if sealed well. When thawing, let it come to room temperature slowly to avoid moisture.
If your bread gets stale, you can still make it fresh again. Sprinkle it with water and warm it in a 140°F oven for a few minutes. Unsliced bread stays fresh longer, so wait to cut it until you’re ready to eat it. With these tips, your homemade bread will stay delicious for longer.
FAQ
What type of flour is best for making homemade bread?
How important is a kitchen scale when baking bread?
How do I know when I’ve kneaded the dough enough?
Why isn’t my bread rising properly?
How can I create a crispy crust at home?
How long can I store homemade bread?
Can I add other ingredients to my bread dough?
What’s the difference between active dry yeast and instant yeast?
How do I fix dense or heavy bread?
Can I make bread without a stand mixer?
Source Links
- You make good bread. Here are 8 tips to make it great. – https://www.kingarthurbaking.com/blog/2023/02/07/tips-for-better-bread
- 12 tips for making perfect bread – https://www.bhf.org.uk/informationsupport/heart-matters-magazine/nutrition/dough/12-tips-for-perfect-bread
- The Beginner’s Guide to Making Bread – A Hygge Homestead – https://www.ahyggehomestead.com/beginners-guide-making-bread/
- The Science of Baking Bread – https://www.seriouseats.com/breadmaking-101-the-science-of-baking-bread-and-how-to-do-it-righ
- Bread Making Tips and Basics for Beginners – https://heartscontentfarmhouse.com/bread-making-tips-and-basics-for-beginners/
- The Tools of Bread Making — abreaducation – https://www.abreaducation.com/content/the-tools-of-bread-making
- My Highly Curated Baking Tools | The Perfect Loaf – https://www.theperfectloaf.com/my-baking-tools/
- After Baking More Than 100 Loaves, These Are the Tools I Swear by for Amazing Homemade Bread – https://www.foodandwine.com/cooking-techniques/baking/bread-baking-tools
- The Science Behind… measuring your ingredients – https://thebreadmaiden.com/2015/12/03/the-science-behind-measuring-your-ingredients/
- The Importance of Measuring Ingredients Properly – The ImaginariYUM – http://imaginariyum.com/the-importance-of-measuring-ingredients-properly/
- How to Mix and Knead Bread Dough Like a Pro – https://www.seriouseats.com/breadmaking-101-how-to-mix-and-knead-dough-step-by-step
- How to Knead Dough (Video) – Sally’s Baking Addiction – https://sallysbakingaddiction.com/how-to-knead-dough/
- Getting Bread To Rise (And Why It Happens) | Bigger Bolder Baking – https://www.biggerbolderbaking.com/getting-bread-to-rise/
- Bread Science 101 | Exploratorium – https://www.exploratorium.edu/explore/cooking/bread-science
- Why Do Some Bread Recipes Call For a Second Rise? – https://www.allrecipes.com/article/bread-second-rise/
- The Ultimate Guide to Shaping Bread Dough | The Perfect Loaf – https://www.theperfectloaf.com/guides/shaping-bread-dough/
- How to Shape a Pan Loaf (Sandwich Bread) | The Perfect Loaf – https://www.theperfectloaf.com/guides/shaping-a-pan-loaf/
- Why Shaping Dough Matters (Even for Bread Machine Users) – https://saladinajar.com/bread-machine/shaping-dough/
- The Ultimate Guide to Baking Bread Dough | The Perfect Loaf – https://www.theperfectloaf.com/guides/the-ultimate-guide-to-baking-bread-dough/
- Tips for Better Bread Baking (no more dense or crumbly loaves) – https://melissaknorris.com/podcast/tips-for-better-bread-baking/
- Making Bread More Flavorful – https://dawghousebakery.com/2022/10/29/making-bread-more-flavorful/
- What Gives Bread Flavor? – https://www.bobsredmill.com/blog/healthy-living/what-gives-bread-flavor/
- Ultimate Troubleshooting Guide for Baking Bread – https://dontwastethecrumbs.com/ultimate-troubleshooting-guide-for-baking-bread/
- Breadmaking 101: How to Troubleshoot Bad Bread – https://www.seriouseats.com/troubleshoot-bad-bread-messed-up-loaf
- The Best Way to Store Bread | The Perfect Loaf – https://www.theperfectloaf.com/the-best-way-to-store-bread/
- The Right Way to Store Homemade Bread So It Stays Fresh – https://www.marthastewart.com/how-to-store-homemade-bread-8557885
- The best way to store yeast bread – https://www.kingarthurbaking.com/blog/2020/07/08/the-best-way-to-store-yeast-bread