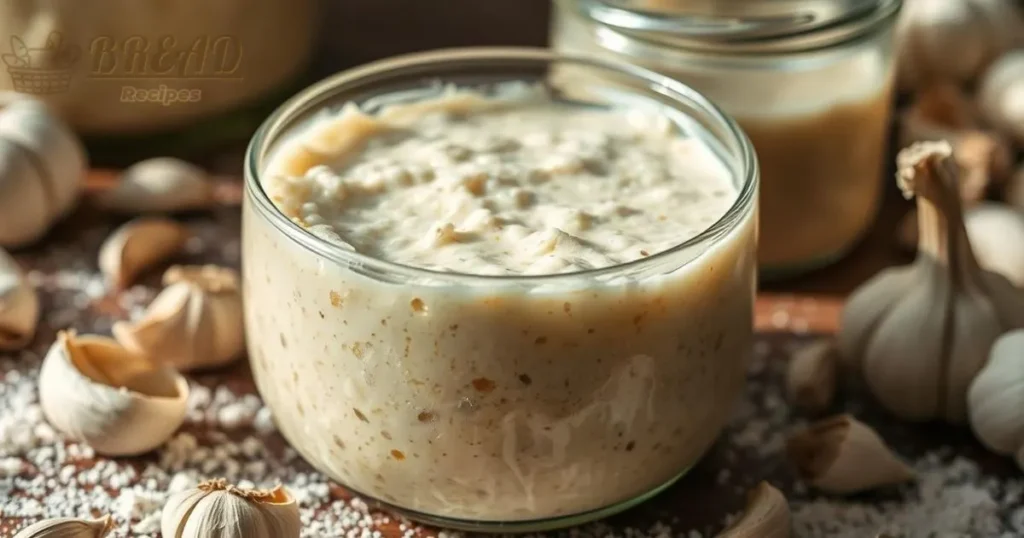
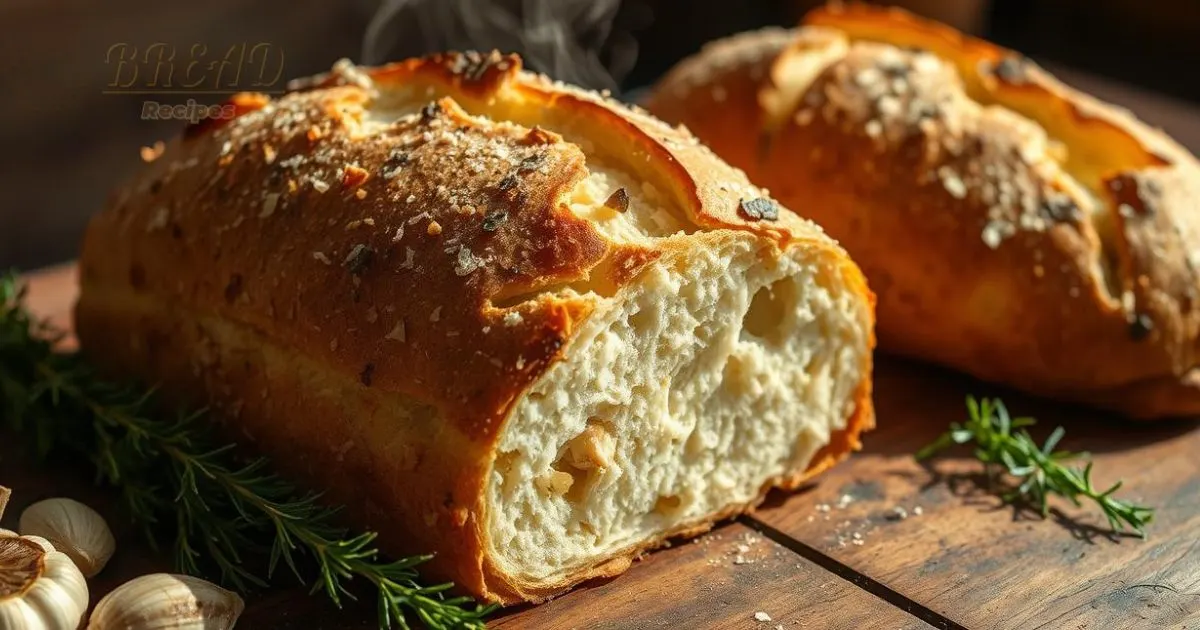
The smell of fresh bread in the kitchen is a joy. But add roasted garlic and rosemary, and it’s a feast for the senses. Welcome to garlic sourdough bread, where breadmaking meets flavor.
I’ve always loved sourdough. Its long fermentation makes it chewy and crisp. Plus, it’s easier to digest and packed with nutrients. Roasted garlic takes it to another level.
Table of Contents
Key Takeaways
- Garlic sourdough bread combines the tangy flavor of sourdough with the savory notes of roasted garlic and fresh rosemary.
- The long fermentation process makes the bread more digestible and enhances the nutrient absorption.
- Roasted garlic offers a range of health benefits, including antioxidant properties and immune system support.
- The recipe calls for a carefully balanced blend of all-purpose, whole wheat, and bread flours.
- The dough undergoes a series of stretch and fold techniques to develop the gluten structure and create an open, airy crumb.
Understanding Garlic Sourdough Bread
Garlic sourdough bread is a special twist on the classic sourdough. It combines roasted garlic with sourdough’s tangy taste. This mix makes a bread that’s both tasty and good for you.
What Makes Garlic Sourdough Special
The fermentation process is what makes garlic sourdough bread stand out. It takes 12-48 hours, breaking down gluten and making the bread easier to digest. The garlic infuses its flavor into the dough, giving it a delicious aroma and taste.
Health Benefits of Fermented Bread
Sourdough bread is healthier than other breads because of its fermentation. This slow process boosts its nutritional value, making minerals like calcium and zinc more available. It also pre-digests gluten, which is easier on the stomach.
The Science Behind Sourdough Fermentation
The fermentation process is what makes sourdough unique. Lactobacillus bacteria and wild yeasts create organic acids like lactic and acetic acid. These acids give sourdough its tang and lower its glycemic index, which is good for blood sugar control.

“Sourdough bread is a true testament to the power of natural fermentation. The slow, patient process unlocks a world of flavor and nutrition that simply can’t be replicated in other bread varieties.”
Essential Ingredients and Equipment
To make delicious garlic sourdough bread at home, you need a few key things. First, an active sourdough starter is crucial. It makes your dough rise. You’ll also need bread flour for a chewy texture and whole wheat flour for extra flavor.
For baking, a Dutch oven is a must. It helps make a crusty outside and a soft inside, just like bakery ovens. You’ll also need a digital scale, parchment paper, a bread lame or razor, and a proofing basket or banneton.
| Ingredient | Quantity |
|---|---|
| Bread flour | 500g |
| Whole wheat flour | 100g |
| Active sourdough starter | 100g |
| Filtered water | 400g |
| Sea salt | 10g |
| Roasted garlic | 50g |
| Parmesan cheese | 50g |
| Fresh rosemary | 10g |
With these sourdough starter, bread flour, and Dutch oven, you’re ready to bake. You’ll make a loaf of garlic sourdough bread that’s perfect for your taste.

Preparing Your Sourdough Starter
Creating a vibrant, active sourdough starter is key to baking amazing garlic sourdough bread at home. It takes time and patience, but the results are worth it. Let’s explore how to prepare your sourdough starter and keep it alive.
Feeding Schedule for Active Starter
To keep your sourdough starter active, you must feed it often. It usually takes 5-7 days of daily feedings to create a starter from scratch. During this time, discard half of the starter and add fresh flour and water in equal parts.
Testing Starter Readiness
Your sourdough starter is ready when it doubles in size in 6-8 hours after feeding. It should have lots of bubbles and a tangy smell. You can also do a “float test” by dropping a spoonful into water. If it floats, it’s ready to use.
Maintaining Starter Health
To keep your sourdough starter healthy, care for it daily if it’s at room temperature. If it’s in the fridge, feed it once a week. The starter’s fermentation creates bubbles, giving sourdough its unique texture. Proper care ensures your garlic sourdough bread rises perfectly every time.
“The acids produced during sourdough fermentation lower the bread’s glycemic index, resulting in a slower release of sugars into the bloodstream.”
Sourdough fermentation makes minerals in the flour more available, making it healthier than regular bread. By following these steps, you’ll have a thriving sourdough starter ready to make your perfect garlic sourdough bread.
Roasting Garlic for Perfect Flavor
Take your garlic sourdough bread to the next level by roasting fresh garlic. This simple method turns raw garlic into a sweet, caramelized treat. It adds an unmatched depth of flavor to your dough. Follow a few easy steps to make the perfect roasted garlic for your homemade sourdough.
Start by heating your oven to 400°F (200°C). Peel 2-3 whole garlic bulbs, leaving the cloves inside. Put the garlic on a baking sheet and drizzle with olive oil. Add a pinch of fine sea salt on top. Roast for 45 minutes to 1 hour, until the cloves are soft and golden.
After the roasted garlic cools a bit, squeeze the cloves out of their skins with a fork. Mash them until you get a smooth paste. This garlic purée will make your sourdough dough even more flavorful.
Adding roasted garlic to your dough changes the game. The sweet, nutty taste of the garlic will fill every bite. Enjoy this aromatic bread fresh or use leftovers for garlic toast the next day.
The secret to perfect roasted garlic is time and temperature. Adjust these to get the right caramelization and softness. With practice, you’ll get the perfect garlic bread flavor every time.
Creating the Perfect Dough
Making the perfect garlic sourdough bread dough is all about the right techniques and ingredients. The dough’s texture and taste start with how you mix it.
Mixing Techniques
Begin by mixing your levain (sourdough starter) with bread flour, whole wheat flour, and water. Let it rest for 30 minutes before adding the salt. This step helps the gluten develop, making the bread rise well.
Proper Hydration Levels
- This recipe uses a 70% hydration level for a softer crumb and more open texture.
- Keeping the right dough hydration is key for the perfect consistency and baking.
- Try different hydration levels to find your favorite bread texture.
Temperature Considerations
Keep an eye on the dough’s temperature, aiming for about 78°F. This temperature is best for fermentation and gluten development, leading to a better bread.
| Ingredient | Quantity |
|---|---|
| Bread Flour | 700g |
| Water | 490g (70% hydration) |
| Ripe Sourdough Starter | 100g |
| Salt | 16g |
By focusing on mixing techniques, hydration, and temperature, you’re on your way to making the perfect garlic sourdough bread dough. This will help you create an amazing loaf.
Mastering the Stretch and Fold Method
Making garlic sourdough bread at home is an art that requires a key technique: the stretch and fold. This method strengthens the dough’s gluten strands, giving it a chewy texture. It’s a gentler way to develop the dough compared to kneading.
For best results, do 3-4 sets of stretch and folds over 2 hours during the bulk fermentation. To do this, wet your hand, grab the dough from the bottom, pull it up and over, turn the bowl, and repeat. This helps the dough’s gluten network grow, leading to a better rise and crumb.
- Wet your hand to prevent the dough from sticking.
- Reach to the bottom of the bowl and gently pull the dough up and over itself.
- Turn the bowl a quarter turn and repeat the stretch and fold.
- Perform this process 3-4 times over a 2-hour period during the bulk fermentation.
The stretch and fold technique is vital for dough development. It strengthens the gluten without kneading. By using this method, you’ll get a loaf with a perfect rise and a delightful chew.
Bulk Fermentation Process
After stretching and folding the dough, it’s time to let it rest in a warm place (78-80°F) for 1.5-2 hours. This stage is crucial for developing the dough’s flavor and structure. When the dough puffs up and has bubbles on the surface, it’s ready for the next steps.
Time and Temperature Control
The bulk fermentation’s time and temperature are key to your garlic sourdough bread’s success. Keeping the temperature between 74-76°F (23-24°C) is important. Warmer temperatures (78-80°F) make the bread sweeter and faster. Colder temperatures make it tangier and slower.
Signs of Proper Fermentation
- The dough should increase in volume, becoming noticeably puffed up and jiggly to the touch.
- You’ll start to see scattered bubbles appearing on the surface of the dough, indicating active fermentation.
- The dough will have a pleasant, yeasty aroma, signaling the development of complex flavors.
Watch the dough closely during this stage. The timing can change based on temperature and starter strength. When the dough shows these signs, it’s time to proceed with the next step.
Shaping Your Garlic Sourdough Bread
Shaping the dough is key to making the perfect sourdough loaf. After it rises, it’s time to shape it into a beautiful bread shaping masterpiece.
Start by placing the dough on a floured surface. Use your hands to shape it into a smooth ball. Let it rest for 30 minutes to relax the gluten.
- After resting, shape the dough into a tight round. Fold the edges to the center for a smooth surface.
- Flip it over, seam-side up. Use your hands to tuck the dough under itself, making a neat boule.
- Put the shaped dough, seam-side up, in a parchment-lined basket or a floured bowl.
Remember, handle the dough gently to keep the air pockets. With practice, you’ll shape your sourdough loaf with ease.
The final proof is the last step before baking. It lets the dough develop flavor and structure. With these techniques, you’re on your way to a beautiful and delicious sourdough loaf.
Cold Fermentation and Final Proof
After shaping your garlic sourdough dough, it’s time for cold fermentation. Place the dough in the fridge for 12 to 18 hours. This slow process makes the bread’s flavor more complex and rich.
If you’re baking the same day, skip cold fermentation. Let the dough rise in a warm place for a few hours. This final proof is key for the perfect texture and rise.
Optimal Timing for Best Results
The timing of cold fermentation and final proof is key. The levain, or sourdough starter, peaks at 76°F in 10 to 12 hours. It should grow 3 to 3.5 times its original size.
Storage During Cold Ferment
When storing dough, you have options. Use a lightly oiled bowl covered with a damp towel or plastic wrap. Or, a proofing basket keeps the dough’s shape. Always keep it refrigerated.
Getting the temperature and time right is crucial for perfect garlic sourdough. Mastering these steps will unlock your loaf’s full flavor.
Scoring and Baking Techniques
To get the perfect crust and crumb on your homemade garlic sourdough bread, follow a few key steps. First, preheat your Dutch oven to a hot 500°F for 30 minutes to an hour. This high heat helps create a beautiful bread scoring pattern and a crisp crust.
When your dough is chilled and ready, score its surface with a sharp lame or knife. A long slash down the center is classic, but you can try different patterns. The scored dough bakes covered at 500°F for 20 minutes, helping it rise and get a light crumb.
Then, lower the oven to 475°F and bake uncovered for another 25 minutes. This step makes the crust golden brown and gives it a Dutch oven baking look. Watch it closely to avoid burning, as oven temperatures can change.
After baking, let the loaf cool on a wire rack for at least 2 hours before slicing. This resting time lets the bread’s internal structure set, giving it a great texture and flavor.
“The key to a perfect garlic sourdough loaf is in the scoring and baking. Mastering these techniques will have you turning out bakery-quality bread right from your own kitchen.”
With practice, you’ll get better at scoring and baking garlic sourdough bread. Just watch the oven and trust your instincts, and you’ll soon enjoy freshly baked loaves.
Storing and Serving Your Fresh Bread
Congratulations! You’ve baked your delicious garlic sourdough bread. Now, learn how to store and serve it right. The right storage and serving can make your homemade bread even more enjoyable.
Storing Your Bread
After your bread cools, you can store it in several ways. The most common is to keep it at room temperature, wrapped tightly or in an airtight container. This keeps it fresh for up to 48 hours, experts say.
To store it longer, freeze your bread. Slice the loaf and wrap each portion in wax paper or plastic wrap. Then, put them in a freezer-safe bag or container. Frozen, your bread can last up to 3 months.
Don’t store your bread in the fridge. The dry air can make it stale and gummy. Instead, keep it in a cool, dry spot on your countertop or in your pantry for the best freshness.
Serving Suggestions
Your garlic sourdough bread is versatile and can be enjoyed in many ways. Here are some tasty serving ideas:
- Avocado toast: Slice the bread and top with creamy avocado, a sprinkle of salt, and your favorite seasonings.
- Grilled cheese: Use the bread to create the ultimate grilled cheese sandwich, with melted cheese and your choice of fillings.
- Soups and stews: Tear or slice the bread and serve it alongside hearty soups and stews, allowing the flavors to soak into the bread.
Enjoy your homemade garlic sourdough bread in any way you like. The key is to appreciate its fresh, crusty texture and robust flavor. With the right storage and creative serving ideas, your bread will stay delicious for days.
Conclusion
Making homemade garlic sourdough bread is a fun and rewarding journey. It lets you create artisan-quality loaves in your kitchen. You’ll learn about sourdough fermentation, dough handling, and oven management.
This process may take patience and practice, but it’s worth it. With the right ingredients and attention to detail, you’ll enjoy tangy sourdough and aromatic roasted garlic in every bite.
Keep improving your sourdough bread-making skills. Try new flavor combinations and baking methods. The joy of making your own unique loaves is unmatched. Dive into the world of homemade garlic sourdough and take your bread-making to new levels.
FAQ
What makes garlic sourdough bread unique?
What are the health benefits of fermented bread?
What are the key ingredients and essential equipment needed to make garlic sourdough bread?
How do you create and maintain a sourdough starter?
How do you properly roast garlic for the bread?
What are the key steps in creating the perfect dough?
How do you perform the stretch and fold technique?
What is the importance of the bulk fermentation process?
How do you properly shape and proof the dough?
What is the proper baking technique for garlic sourdough bread?
How should the baked garlic sourdough bread be stored and served?
Source Links
- Best Garlic Sourdough Bread With Rosemary – https://www.farmhouseonboone.com/best-garlic-sourdough-bread-with-rosemary/
- Garlic Sourdough Bread with Parmesan – SueBee Homemaker – https://suebeehomemaker.com/garlic-sourdough-bread/
- Roasted Garlic Rosemary Sourdough – https://amybakesbread.com/roasted-garlic-rosemary-sourdough/
- Mastering Sourdough Garlic Bread: Recipe, Tips, and Variations – https://loadedrecipes.com/sourdough-garlic-bread/
- Black Garlic Sourdough – Wild Vegan Flower – https://wildveganflower.com/black-garlic-sourdough/
- Rosemary Garlic Sourdough Artisan Bread – https://stayathomesarah.com/rosemary-garlic-sourdough-bread/
- Roasted Garlic + Olive Sourdough Loaf – Acts Of Sourdough – https://actsofsourdough.com/roasted-garlic-olive-sourdough-loaf/
- Simple Artisan Sourdough Bread Recipe – https://countryroadssourdough.com/simple-sourdough-bread-recipe/
- Irresistible Garlic Sourdough Bread Recipe – A Flavorful Twist – https://www.sourdoughsymphony.com/stream/sourdough-garlic-bread
- Roasted Garlic Sourdough | Peak to Plate – https://peaktoplate.com/roasted-garlic-sourdough/
- Sourdough Starter & Country Loaf (Step by Step Guide) – https://bakinghermann.com/sourdough-starter-country-loaf/
- Sourdough Garlic Knots With Roasted Garlic And Pecorino Cheese – The Clever Carrot – https://www.theclevercarrot.com/2024/02/sourdough-garlic-knots-with-roasted-garlic-pecorino-cheese/
- Roasted Garlic Bread – https://cookieandkate.com/roasted-garlic-bread-recipe/
- Rosemary Garlic Sourdough Bread with Parmesan Cheese – https://idiesfarm.com/rosemary-garlic-sourdough-bread-with-parmesan-cheese/
- Cheesy Garlic Sourdough Focaccia – https://amybakesbread.com/cheesy-garlic-sourdough-focaccia/
- Good Sourdough Bread (My Master Sourdough Recipe) | Grant Bakes – https://grantbakes.com/good-sourdough-bread/
- Essential Sourdough Tips for Perfect Loaves Every Time – https://www.sourdoughsymphony.com/stream/perfecting-your-sourdough/
- Sourdough Bulk Fermentation—Your Questions Answered – https://abigailsoven.com/blogs/abigails-oven/sourdough-bulk-fermentation-your-questions-answered?srsltid=AfmBOopzGJ-WCvQrK_HHkM_a4YhJSUD4AuRIcobLVVl7qNPh5zEl2Xgf
- sourdough – The Dawg House! – https://dawghousebakery.com/tag/sourdough/
- Sourdough Bread with Roasted Garlic and Rosemary – https://adamantkitchen.com/rosemary-garlic-sourdough-bread/
- Rosemary Infused Sourdough Bread with Roasted Garlic and Fresh Rosemary – Create With Kendra – https://www.createwithkendra.com/baked-goods/rosemary-infused-sourdough-bread-with-roasted-garlic-and-fresh-rosemary/
- Miso Garlic Black Sesame Scallion Sourdough Milk Rolls – https://www.thefreshloaf.com/node/73525/miso-garlic-black-sesame-scallion-sourdough-milk-rolls
- How to Proof Bread Dough (Even When It’s Cold Outside) – https://www.tasteofhome.com/article/how-to-proof-bread-when-its-cold-outside-and-inside/?srsltid=AfmBOop_d0KrXiD-ERFLhTqx3dx7UPkhRRVexRcyhDMhva5_jlowE5YL
- The Best Golden Sourdough Bread Recipe | Easy for Beginners – Simply Taralynn | Food & Lifestyle Blog – https://simplytaralynn.com/2024/11/28/the-best-sourdough-bread-recipe-easy-for-beginners/
- Tartine Olive Sourdough Bread – https://www.theperfectloaf.com/tartine-olive-sourdough/
- Green Olive and Herb Sourdough Bread | The Perfect Loaf – https://www.theperfectloaf.com/green-olive-and-herb-sourdough-bread/
- Stop Storing Your Bread in the Fridge, and Try This Pro-Approved Upgrade – https://www.foodandwine.com/chef-approved-bread-bag-8656262
- Our Buttery Garlic Bread Will Make You Ditch The Store-Bought Loaf For Good – https://www.delish.com/cooking/recipe-ideas/a24803098/easy-garlic-bread-recipe/
- The Best Way To Keep Your Bread Fresh, According To A Baker – https://www.southernliving.com/how-to-keep-bread-fresh-8648888?srsltid=AfmBOooNz_HNzLluXFEJ96js9DHdERuAD5f2IEXbL8jgsFXK5N7dLmtm
- Easy Sourdough Bread Recipe – That Bread Lady – https://thatbreadlady.com/easy-sourdough-bread-recipe/
- Sourdough Potato Bread | The Perfect Loaf – https://www.theperfectloaf.com/sourdough-with-roasted-potato-and-rosemary-potato-bread/
- 51 Sourdough Inclusion Ideas: Add-Ins You Should Try – https://thatsourdoughgal.com/sourdough-inclusion-ideas/

